List
of Products, Tools and Materials Used
·
Clay
·
Plaster
·
Paint Brush
·
Vaseline
·
Sealant Spray
·
Talcum Powder
·
Plaster Bandage
·
Brown Mesh
Step-by-step
Instructions for Moulding: Part 2
1.
Now all the sculpting is complete moulding
part 2 starts. Apply a thin layer of clay around the edges of the sculpt, going
around the edges of the keys and leaving a gap away from the sculpt as shown on
the picture. The gap that has now been created needs to have a sharp straight edge.
This is to ensure a really smooth, thin edge on the final piece as the excess
of the foam latex moulding material is pushed outwards into the overflow. The eye
and mouth also need covering with this technique to make sure they have a
smooth, thin edge.

2.
All of the parts that don’t have clay on and
are just bare plaster like the gap away from the sculpt, the nostrils, around
the eyes and mouth need covering in a layer of Vaseline to make sure the mould of
the sculpt does not lock.


3.
To finish preparing the sculpt cover it with a
fine layer of talcum powder and spray it all over with a sealant spray.


4. Next I built a clay wall around the cast. This was to ensure when the plaster is poured over the sculpt it does not spill over the sides and stays where it’s needed. The wall should be about 10cm high and pressed tightly against the side of the cast and the surface so it doesn’t leak out of the sides.


5. To help secure the wall I then added two layers of plaster bandage around the outside of the wall. This was then left to dry.


6. Now the sculpt is ready to have plaster poured into it. The first layer I added was 1 cup of water and 2 cups of plaster. This mix was very fine so I was able to make sure it went into all the detail. I left this to start to set for a few minutes.

7.
The next mix I made was thicker. I mixed 1
cup of water and 2.5 – 3 cups of plaster. I then poured this plaster over the
sculpt once it had started to set I added some brown mesh to strengthen it. I made
another mix of the plaster using the same measurements to pour over the top of
the mesh. As it was thicker it was easier to move into the areas it was needed
in the sculpt, practically I built it up over the nose as it was very pointed
and could easily break.

8.
I then left it for about 15-20 minutes to completely
set.

9.
Once the plaster had set it was then time to separate
the two casts. To do this I first removed the clay wall.


10. Then using a screw driver I gently wedge it between the two casts slowly moving it around the cast. This allows the air to be released through the gap which made it easier to separate.


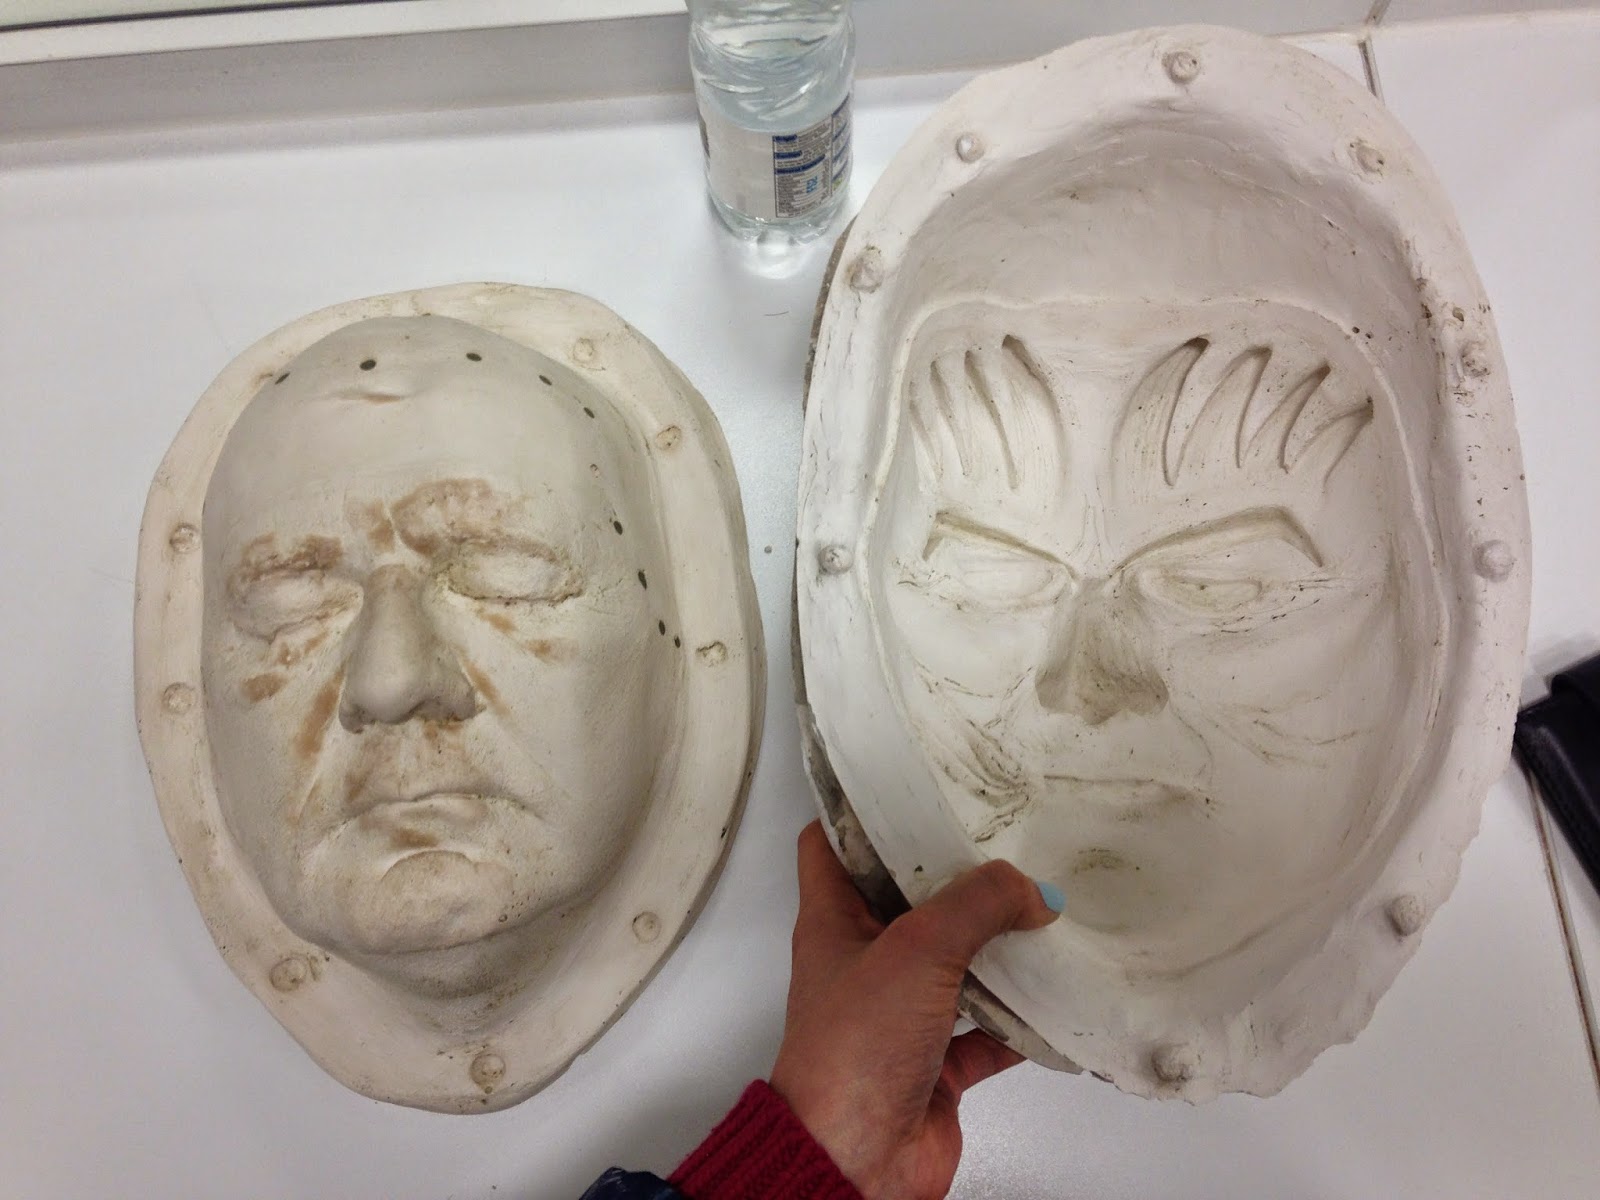
Moulding: Part 2 has most defiantly been the most stressful part of the process so far. This was simply because I knew that it for some reason it went wrong, like for example it locked and would separate or just didn’t cast right I couldn’t do it again as the sculpting is ruined afterwards. It didn’t matter if the sculpt got ruined as I didn’t need it again I just needed the two casts so as long as it worked it would be fine. Luckily it did work and it looks to have turned out really well. Now I’m looking forward to making the foam piece and seeing my final design as a prosthetic.
No comments:
Post a Comment